Facebook Business Manager Setup

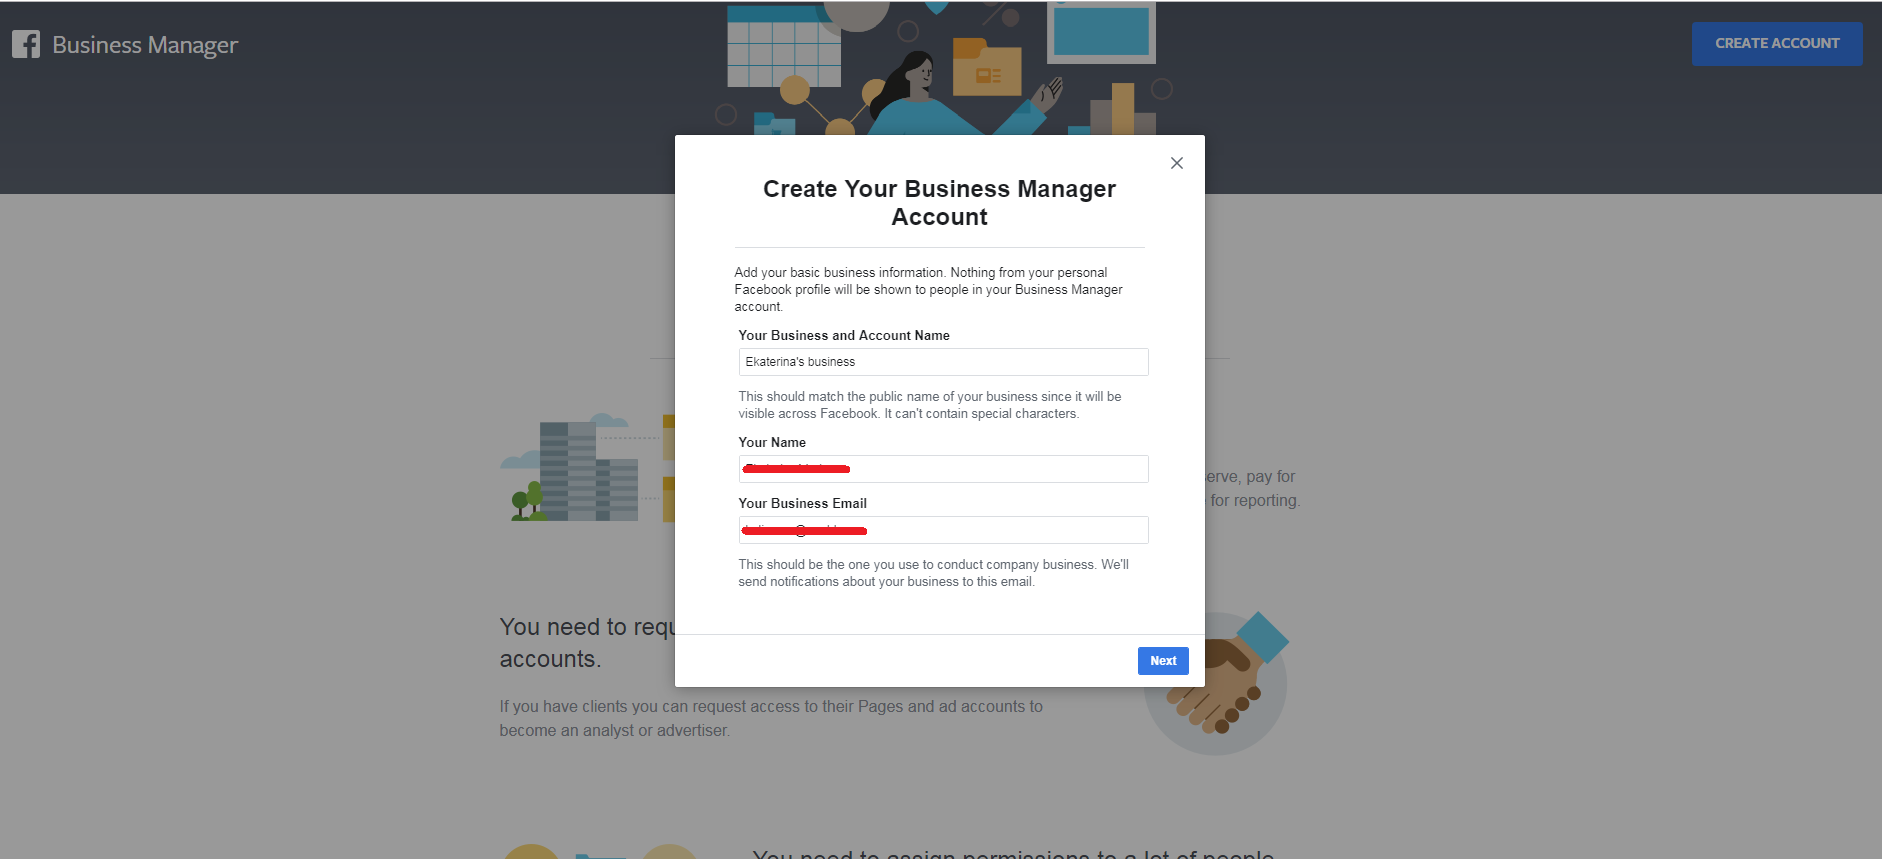
In the previous article we reviewed a free way of promoting on Facebook — through a Facebook page. Now it is time to look at how we can improve our free promotion by adding some paid ads to our marketing strategy. But before publishing paid ads we need to setup Business Manager. Facebook Business Manager is a tool where you can create, edit, assess Facebook ads as well as manage your work with Facebook Pages.
In this article we will examine each step of Facebook Business Manager setup and will overview which tabs you will need to use as a beginner. The most important parameters which we will need to set in order to have a fully packed Business manager are a Facebook Page, an Ad Account and a Payment method. These aspects are essential for creating ads.
Setup


Ad Account creation
Now we need to create an ad account in order to promote products and make ads. Here is how it is done:
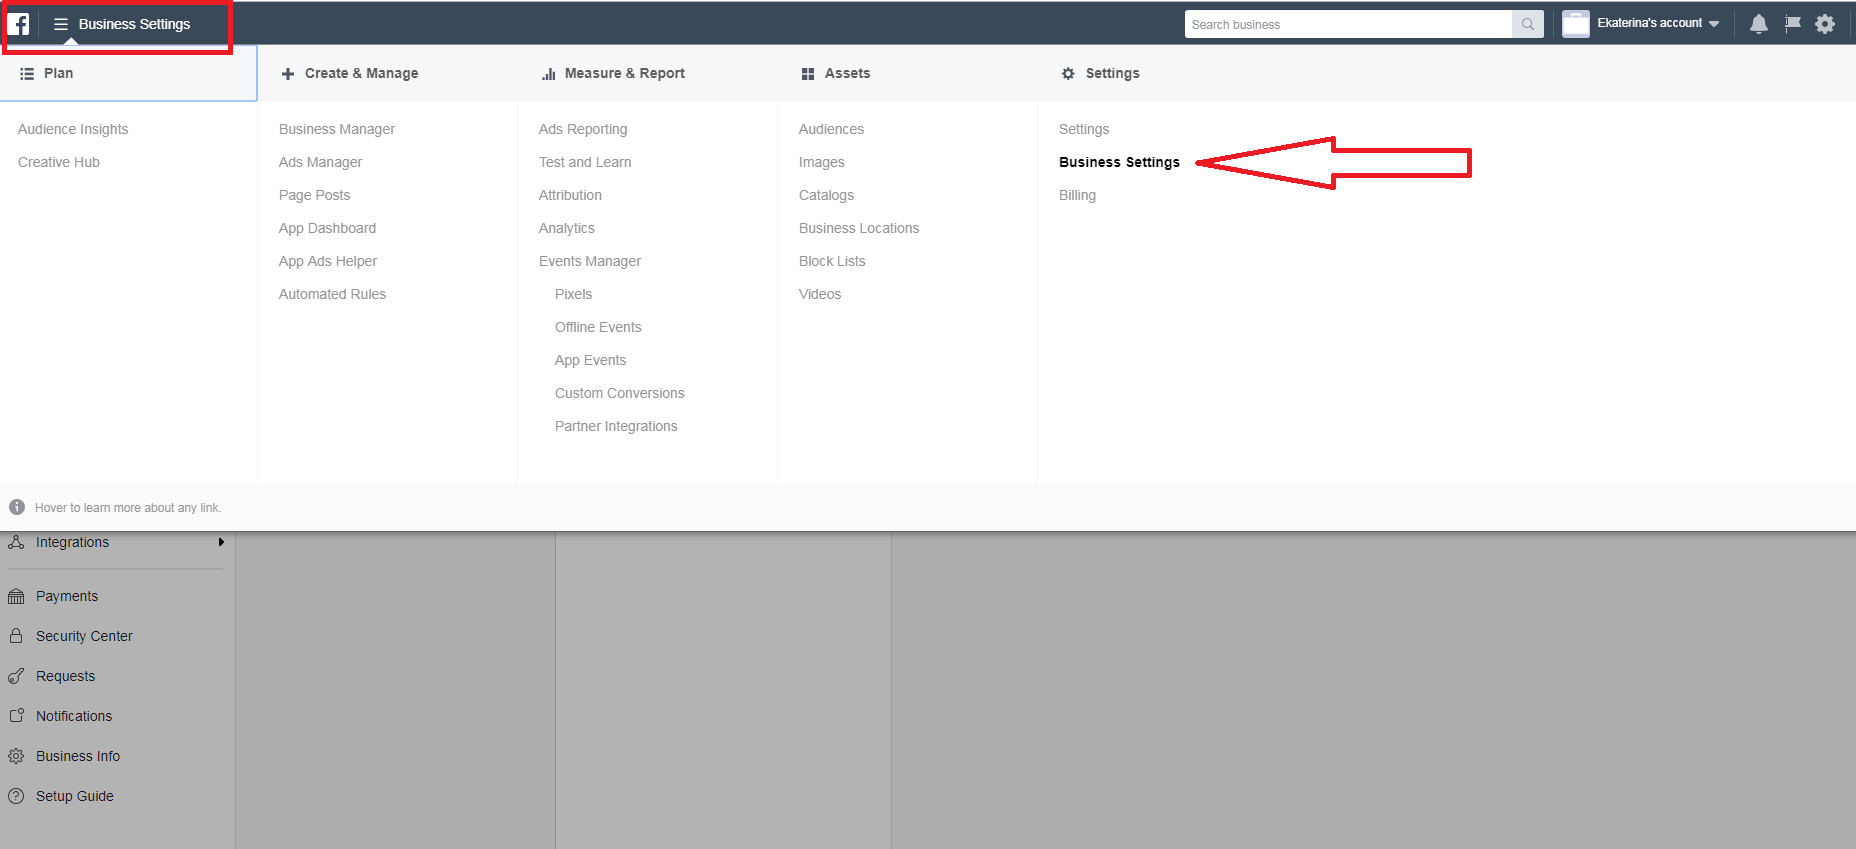
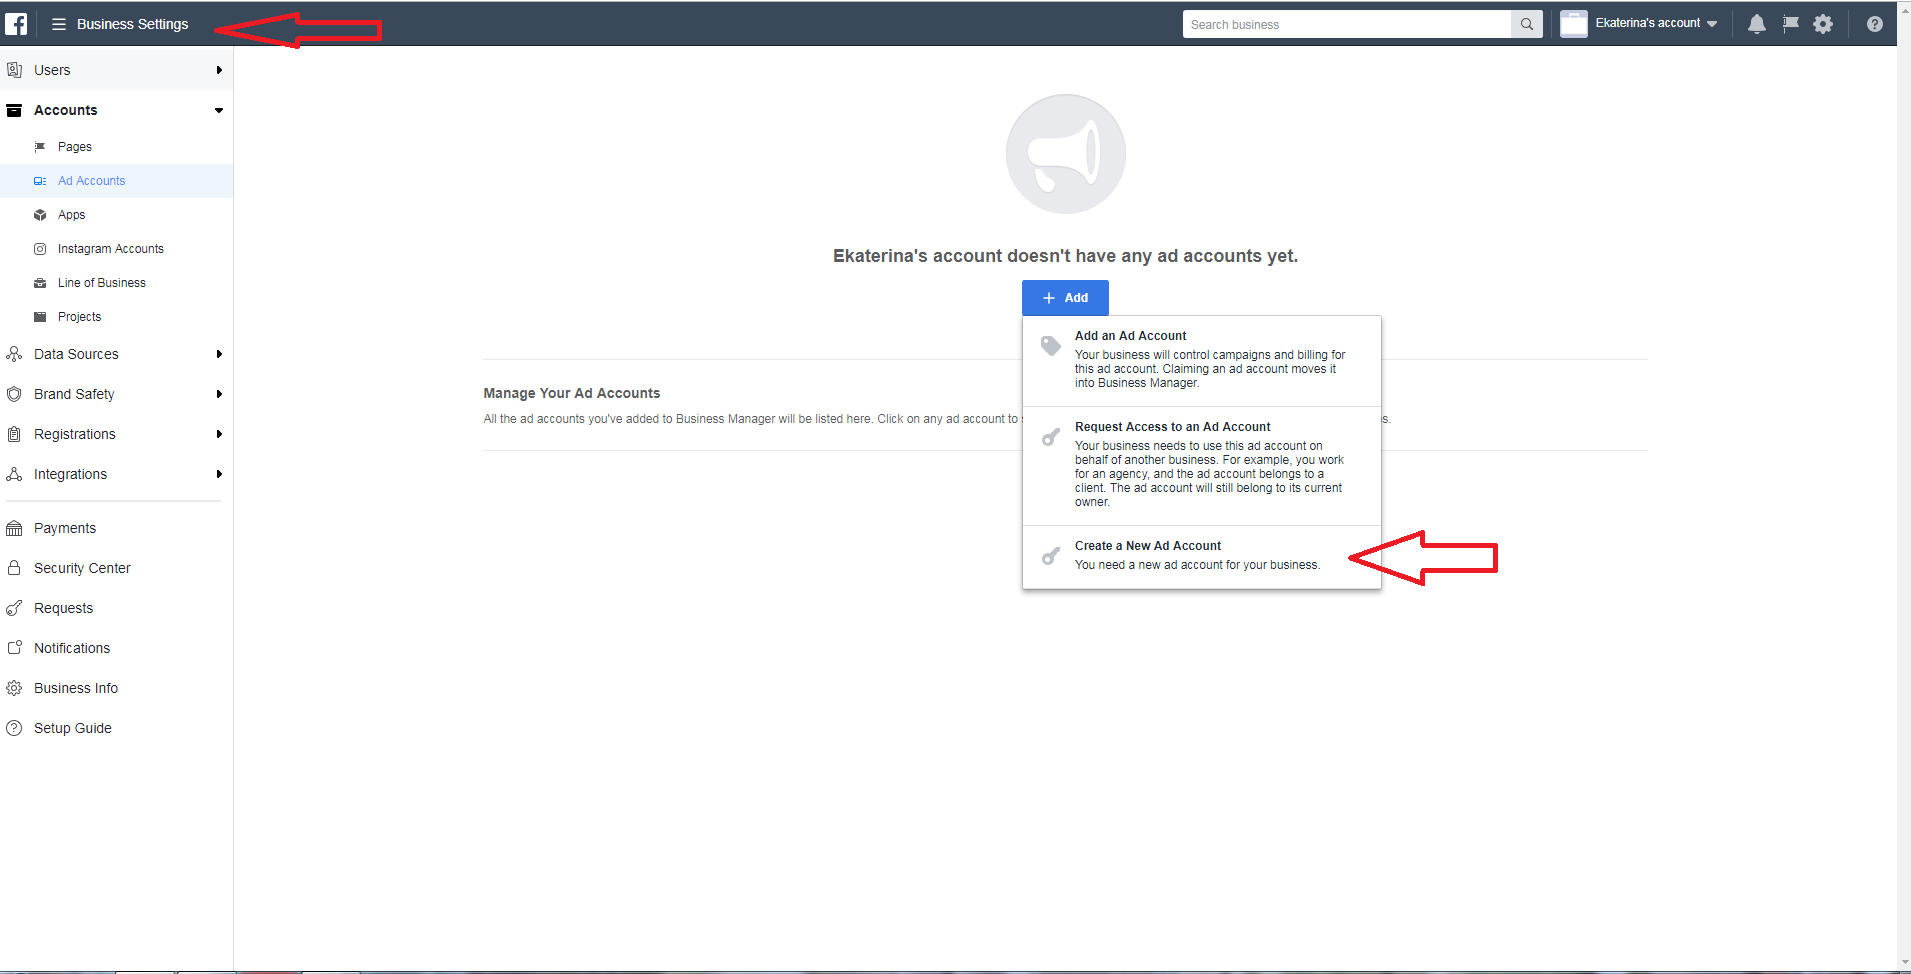
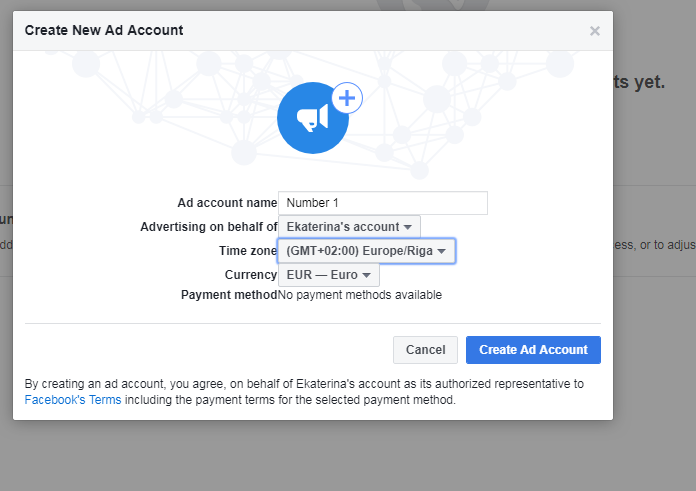
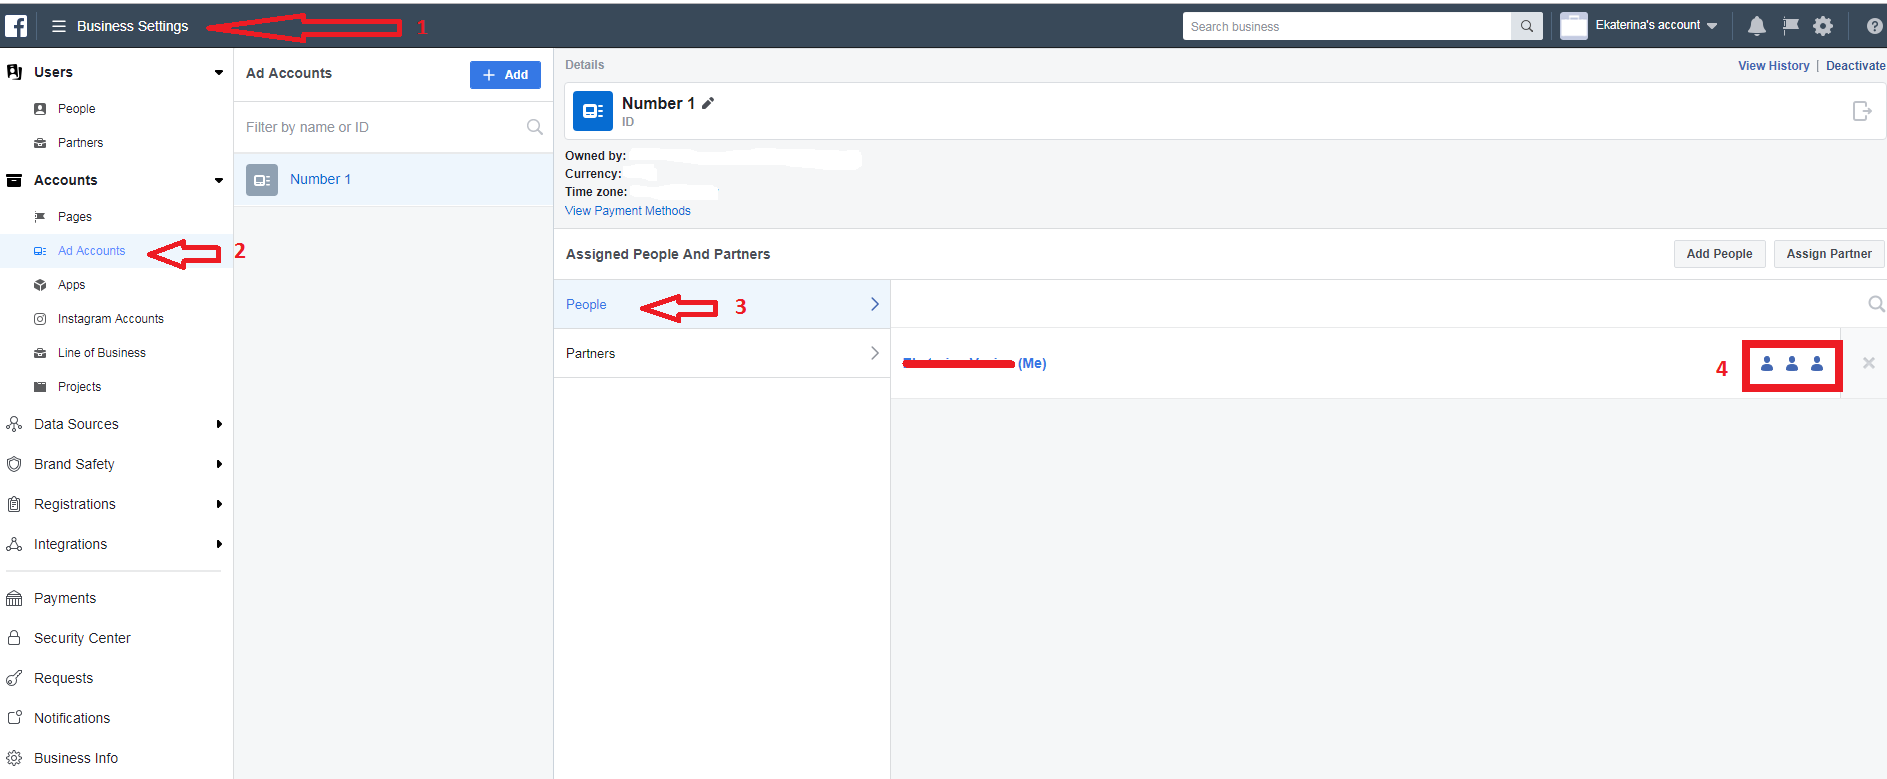
As we don’t have any accounts yet, let’s create a new one. Click on 3 stripes in the left top corner and then on the tab “Business Settings” to make an account. Create a name for the account so that you will be able to distinguish them if you have many. In our case, it will be an account Number 1. Then indicate the information (time zone, currency) correspondent to your business. For example, if you live in Germany and will make ads for this region (or any European country where the currency is Euro), indicate the currency EUR as all future transactions will be carried out in Euro (payments for ads). After clicking on “Create account”, you will see a pop up where you will need to assign yourself as an Admin of the ad account as it will let you perform any actions and check statistics of ads.
There are several page roles which you can always manage in the section “Business settings”. You can both change the roles of people who work with an ad account or a page. The ad account roles which exist:


Payment method setup
Then we need to add the payment method. It is in the section settings – payment settings. As we don’t have any method yet, we need to create a new one. Having clicked on “add payment method” you will see an appeared pop up where you will need to fill in all the information. Check the box accepting that you will be running ads for business purposes or on behalf of a business and then move on.
At the next step, you will be able to select one payment method (credit or debit card, PayPal or Facebook Ad Coupon). If you want to use PayPal or you have a Facebook Ad Coupon, choose those options, but we are going to use a bank card. Having inserted all bank card details, press “Continue”. It can take several minutes till the process will be finished.
Keep in mind that all changes regarding the ad account, acount roles, associated pages should be done in the section “Business settings”. You can also add there new partners if you want to allow several people to have access to your account and to work in it. If you want to link your Instagram account to Facebook to manage everything at one place, it should be also done in “Business settings”.
Additional features
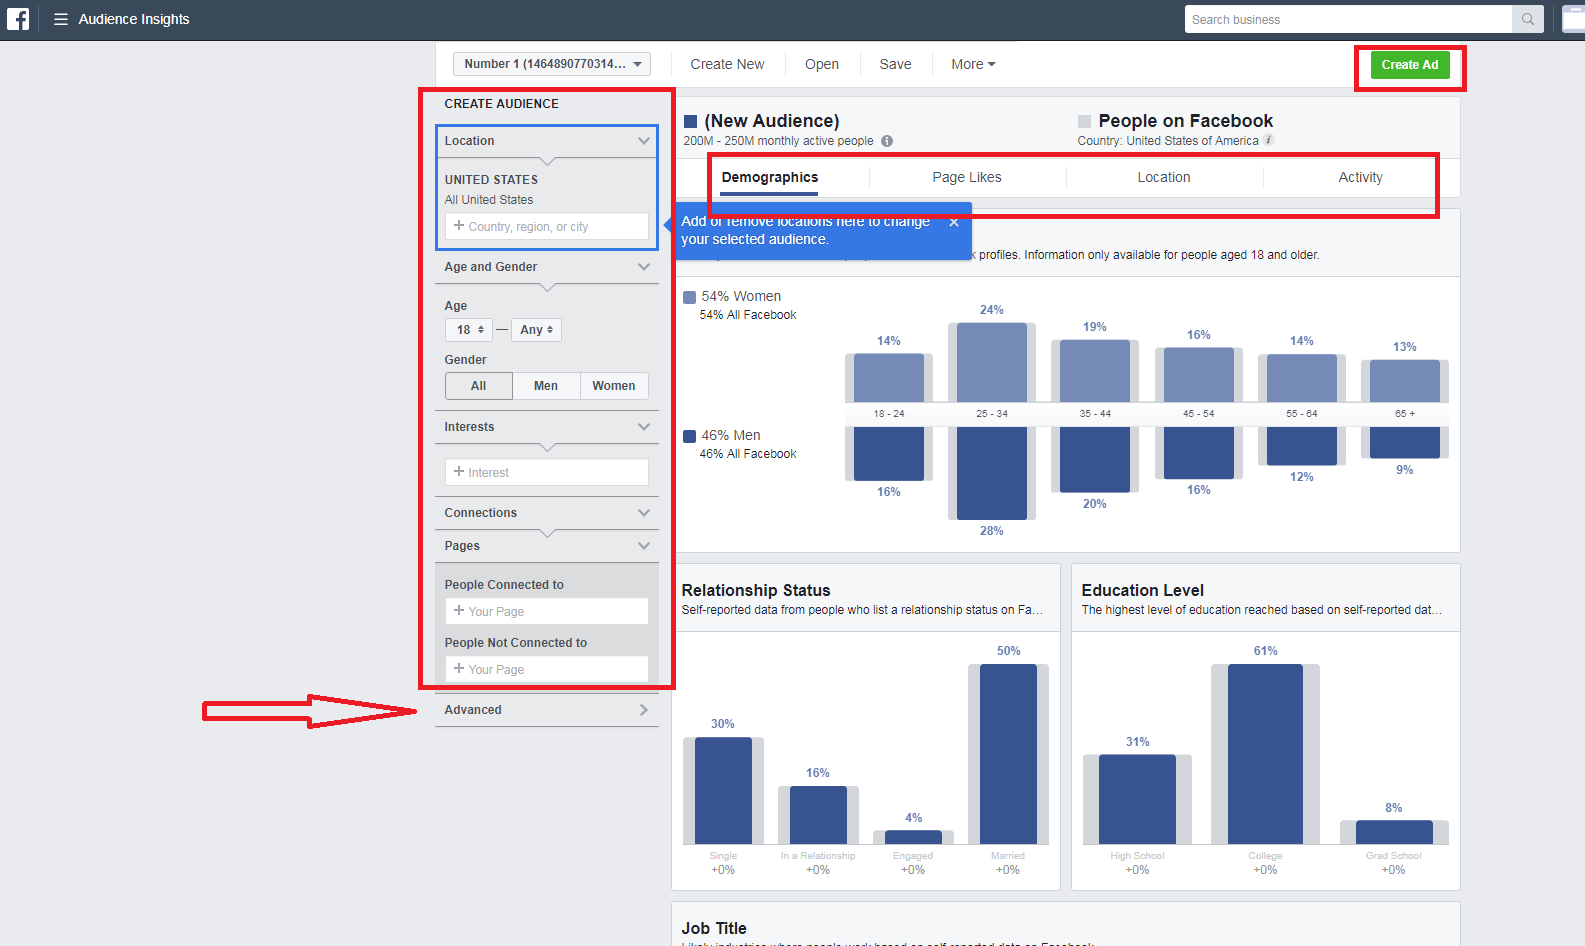
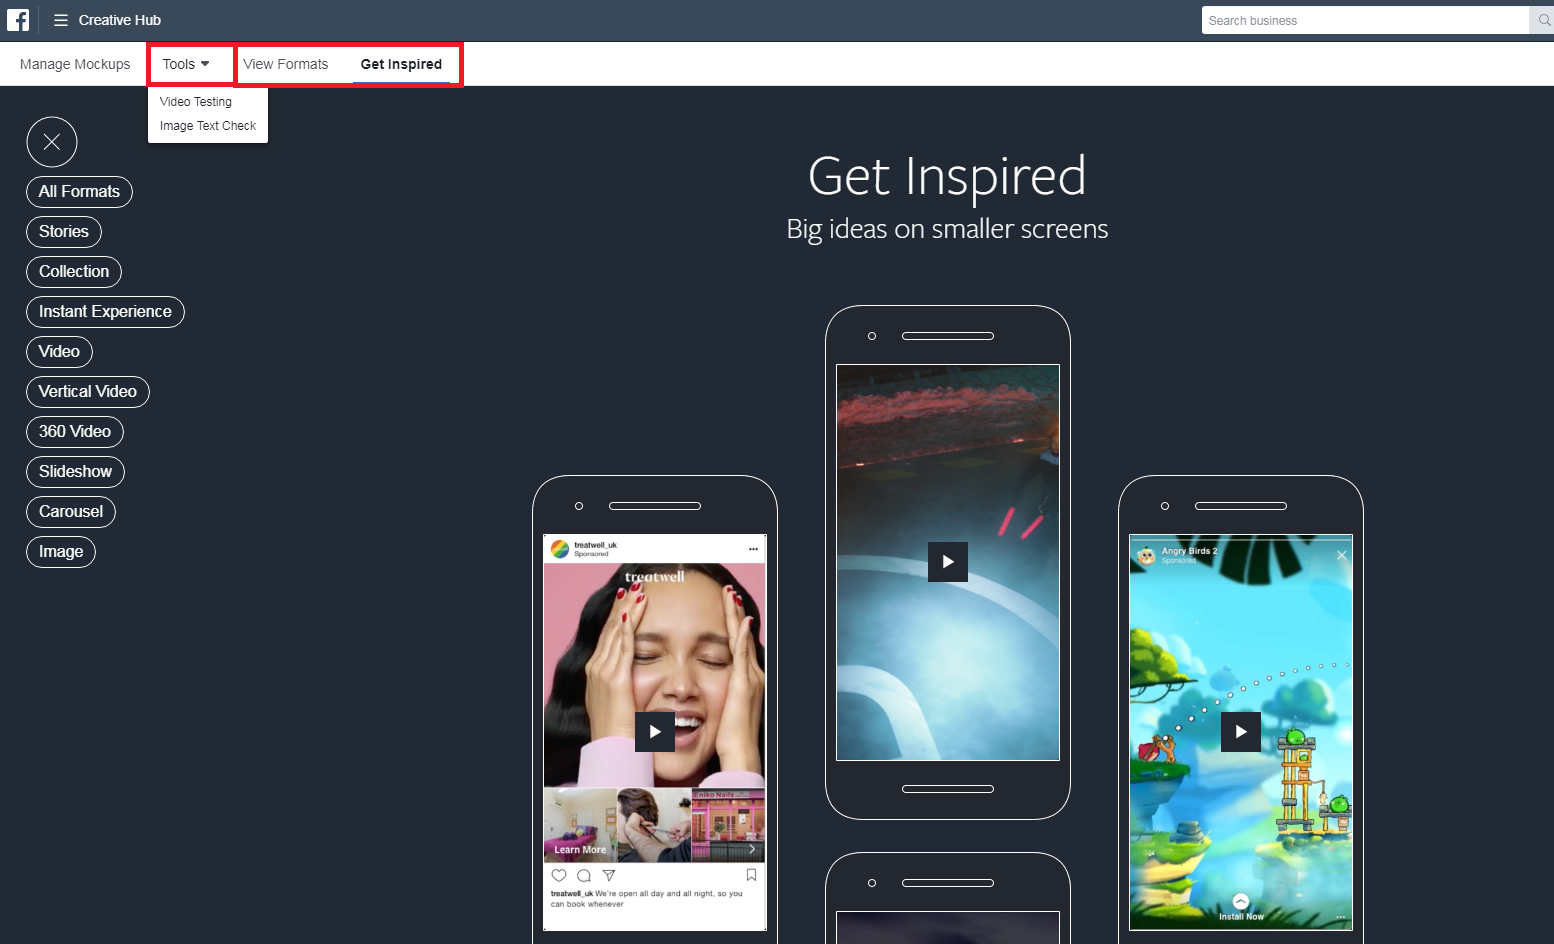
We have finished setting up the important parameters of Business Manager: Ad Account, Page, Payment method. Now let’s take a quick look at what else useful we can find.


We have examined the process of setting up Business Manager and adjusting all necessary parameters: creating an ad account, adding a page and creating a payment method. Now we are ready to create Facebook Ads, so in the next article, we will review how to create a campaign, ad sets, and ads. We will also examine the tabs which we will need for setting the targeted audience and evaluating the outcome of ads.







Great
Legal gostei vou tentar por em pratica!
I’m going to do promotional campaigns through social media and other platforms